
If you would to turn your Raspberry into a control center for your intelligent home but you don’t know how to turn on and turn off the lights from your smartphone or you have to launch a python script to control the temperature of your house? Here is the solution.
What do you need?
- Raspberry Pi 2/3
- Apache server (if you haven’t already installed it be sure to check my guide)
- If you want try with a led (It simulates the lamp)
So let’s start!
Create the php file that you see and where you launch the script.
Mount the apache’s directory:
cd /var/www/html
Now open the editor to create and edit our PHP file:
sudo nano page.php
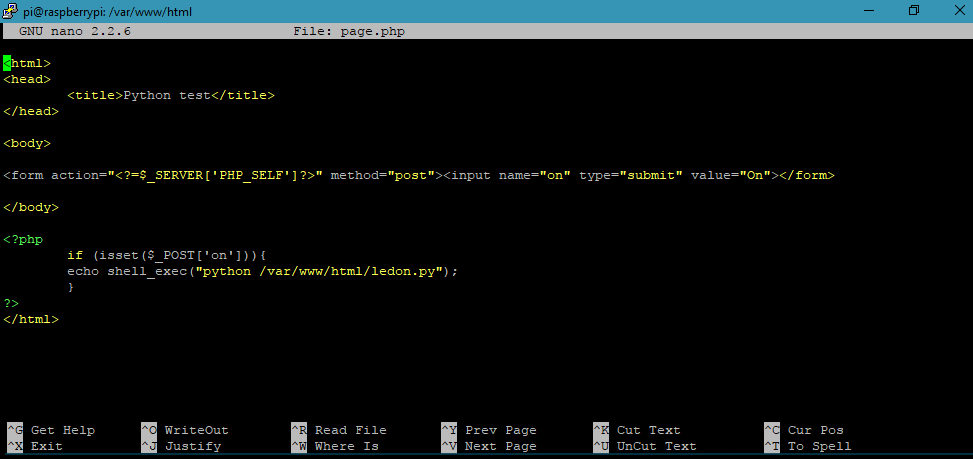
Put this code inside (“ledon.py” is the name of the my python script that will lights up the led, change it with yours). It contains a simple HTML code to create a graphic web page and show the button.
<html>
<head>
                 <title>Python test</title>
</head>
<body>
<form action="<?=$_SERVER['PHP_SELF']?>" method="post"><input name="on" type="submit" value="On"></form>
</body>
<?php
                 if (isset($_POST['on'])){
                echo shell_exec("python /var/www/html/ledon.py");
                 }
?>
</html>
Example of python script (turn on a led or some lights):
This is my python script that will turn on a led. Its name is “ledon.py”.
Than you can do the same to turn off the led, just change the last line with False instead of True. Save the file with another name (like “ledoff.py”) and add another button in the HTML code wich refers to this new python file.
import RPi.GPIO as GPIO

GPIO.setmode(GPIO.BCM)

GPIO.setup(4, GPIO.OUT)

GPIO.output(4, True)
Now you have to change the owner of the php and python file. So copy and run this code:
sudo chown -R pi:www-data /var/www/html
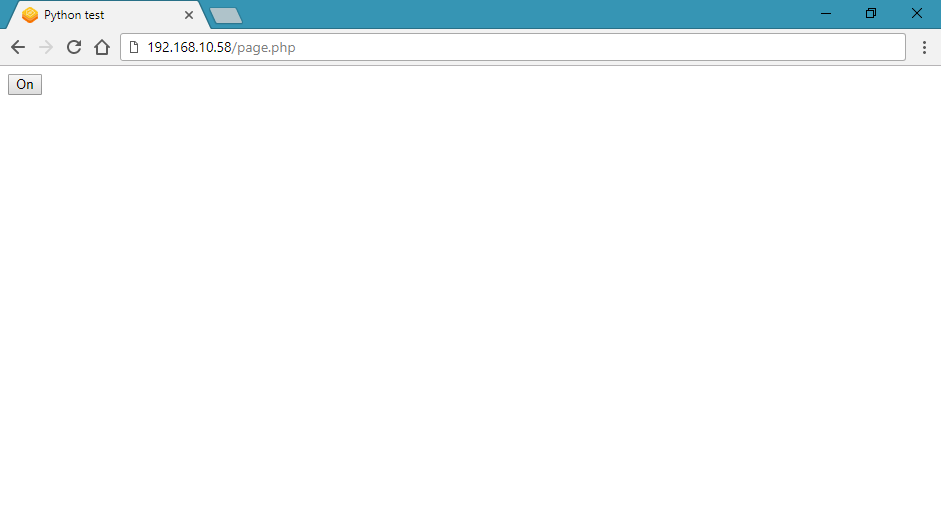
That’s all, open the browser and write the IP’s address of the Raspberry /page.php (ex. 192.168.10.54/page.php).
Finally we can turn on the lights!
How you can see, if you click On the led magically turn on.
The page is very easy, but you can add a lot of code and make it better 😉