In this tutorial, I’m going to talk you through installing PhpMyAdmin on a linux web server. It works in every linux distro.
Step 1 – Begin the PhpMyAdmin installation
From terminal, we begin by changing to the root user in terminal by entering:
sudo bash
Now we need to install the PhpMyAdmin package using:
apt-get install phpmyadmin
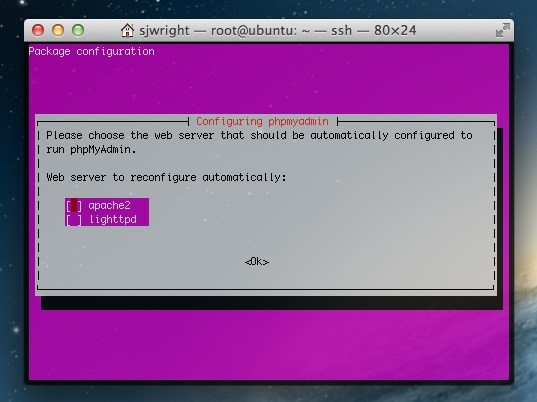
The package will begin installing. You will be asked which web server is installed, choose apache2.
Step 2 – configure for dbconfig-common
Next we’ll need to configure PhpMyAdmin’s database. You’ll see the following prompt:
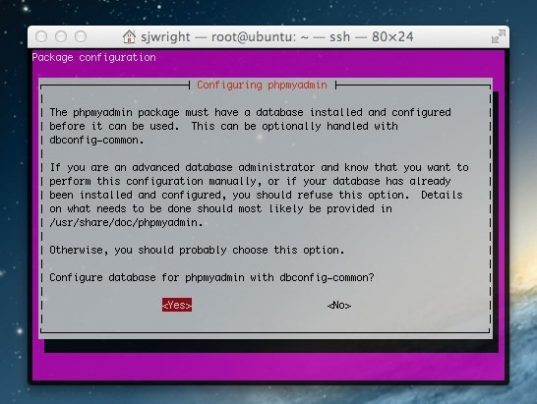
When prompted, choose Yes. Next you’ll be asked for an administrative password, this is the root password that was set during the MySQL installation in the previous tutorial.
You’ll be asked to set a password for PhpMySQL. I’ve used the same password as the MySQL root password, but its up to you what you set here. Make a note of it somewhere.
That’s PhpMyAdmin installed. Next we need to change the apache configuration to allow us to use http://your.raspberrypi.domain/phpmyadmin to access it.
Step 3 – Configure Apache to work with PhpMyAdmin
We need to alter the Apache configuration in order to access PhpMyAdmin. To do this, enter the following command to alter the configuration:
nano /etc/apache2/apache2.conf
The configuration file will load in Nano. Navigate to the bottom of the file and add the following new line to the file:
Include /etc/phpmyadmin/apache.conf
Save the file (CTRL + X and enter Y when prompted to save) and restart Apache2. To restart Apache, enter the following command:
/etc/init.d/apache2 restart
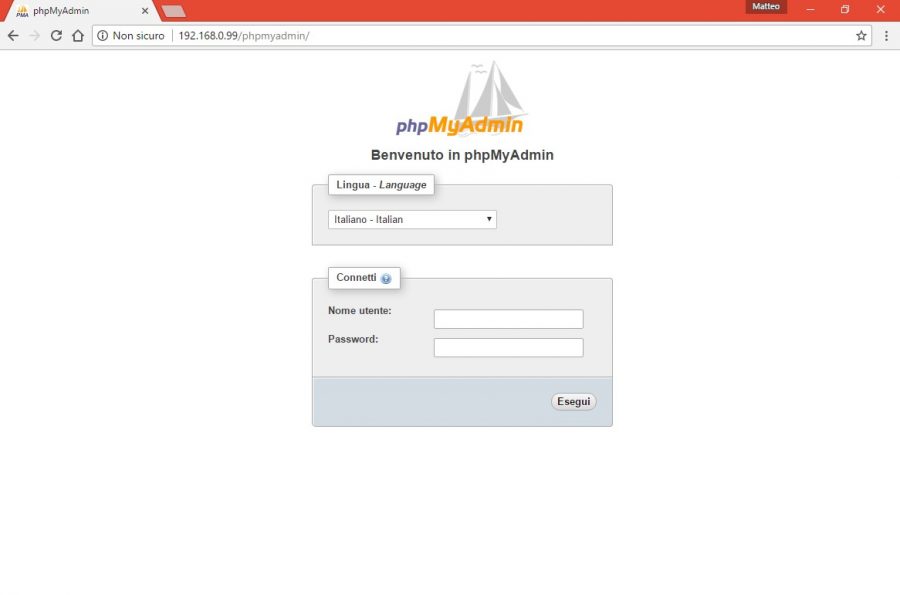
That’s it! You’re all installed and ready to go. Give accessing it a try by going to your server’s IP address or domain name and add ‘/phpmyadmin’ to the end in your web browser.
Look how to build an HTML table with SQL data